Sunday, November 2, 2014

Closing the garden for the season.

It has been a while since I have updated my garden blog. September is a busy month for getting lesson plans and overseeing a new weekend course at our local College.  Our garden was successful for the most part but there are definitely changes I would make to what we learned in our first season of growing:

Seedlings - 
Tomato:  We will seed about a dozen tomato plants of different varieties - we initially planted far too many which crowded the designated tomato bed and had to remove them.  We seeded far too many that were eventually killed by a cold breeze moving through the garage.  

Peppers:  we purchased these at a nursery and they grew and produced very well.  The two plants produced by store bought peppers were slow to grow and produced only a few small peppers.

Onions/leek/garlic:  we will seed these in the few weeks before planting season begins.  They grew well and were a delight in our soups and stir fries.

Potatoes:  This experiment was an epic failure.  The season was too cold and the plants only produced berries.  We will make an effort to plant them in tubs and place them in warm spots out in the back garden.

Brussel sprouts:  These plants produced tiny sprouts due mainly because they were shaded by the tree on the boulevard.  They need full sun.  Cutting the leaves as the plant grew worked out quite well in that the sprouts will only grow when you remove them.

Marigolds:  These were phenomenal flowers and once planted grew much larger than anticipated.  Next year they will be planted outside of the fence to keep the animals at bay.

Front bed:  The flowers here did exceptionally well and the blending of colours and trimming out the bushes encouraged tremendous growth.

Rear yard bed:  The squirrels ate all our apples so we will have to net the entire tree next year.  The squirrels also ingested tomatoes and our one watermellon in the enclosed rear garden.  This too will have to be completely netted.

Cucumbers:  These took up way too much room in the front bed and did not produce well.  We will look to growing these along the fences in the rear yard or create a climber for the beds closest to the house where they will get full sun all day long.

Pumpkins:  These were fun to grow but again, they took up a lot of garden area.  These can easily be grown anywhere.

Cleaning up:
The garden beds are partially frozen this morning and I am out there pulling out the remaining plants.  I had intentions of putting remay cloths out to protect the swiss chard but maintaining the garden through the colder weather will have to wait until next year.


We grew our own pumpkins.......
and then carved them for Halloween.  The two in the middle came out of the front bed.


These were the last of the veggies in September just before the first frost came.....


Tuesday, July 29, 2014

The garden is quickly maturing

Its hard to believe how quickly the garden is growing and maturing in just weeks.  The weather has been rather odd (to say the least) with swings into high humidity and cool nights with brisk winds and overcast skies.  So what does one do?  I planted more beet and carrot seeds a few weeks ago when the first cold front moved in and within hours, the rains fell.  It meant that I did not have to cover the garden against the typical heat of summer and helped to extend the time for lettuce (cool weather plant).  It also kept the tomatoes and peppers growing.  This weekend will be a tomato, pepper and onion harvest in time to make salsa.  I have already made relish from the pickling cucumbers that are now growing like crazy!!!

I had to make room for the new plantings of carrots and beets so I removed the two kale beds.  I gave one full garbage bag away and processed the other one to freeze for use in soups, stews etc.

Freezing and storing Kale

1.  Since I needed the Kale beds for other vegetables (I have some Kale plants in the lettuce bed), I simply pulled out all the plants and cut off the stalks just below the beginning of the leaf on each stalk.  If you want to keep your Kale bed, simply cut the plant a few inches above the ground and it will regrow.

2.  While you are prepping the Kale and rinsing it under cool water, put a large pot on to boil.  Putting the lid on will help to boil the water faster.

3.  You will only be blanching the kale - in other words, not fully cooking it but heating it up and stopping the cooking process to allow it to be able to be frozen for future use.  You can do this with spinach and Swiss chard (one of my friends uses Swiss chard as a wrap for cabbage rolls instead of cabbage).  Once the water is boiling, place the kale into the pot for 3 minutes (time this).

4.  Fill the sink with cold water while you are blanching the Kale - I always add lots of ice to immediately stop the cooking process.

5.  Use a serated spoon or sieve to remove the Kale and immediately put it into the cold water.  The Kale will be a bright green and limp.

6.  Use a salad spinner to try to remove as much water as possible.  I use this and I also use a number of layers of clean cotton dish towels to gently roll the kale in to remove the water.

7.  I use a Food Saver TM to evacuate air and to seal the bags.  The problem with using this method is that the remaining fluid in the Kale will be pulled out to the machine and will not allow for a proper seal. You can continue to use the vaccuum until most of the moisture is out and then use a paper towel to dry the inside of the bag to allow for a proper seal.  My mother used to use a ziplock freezer bag and insert a small straw at one end.  She would suck the air out using the straw and seal the bag up to the straw then quickly remove it while completing the zipper seal to the end.  This takes practice getting it right but it works great.  You do not want freezer burn on your produce so make sure you get as much air out as possible.

8.  Using your frozen Kale is easy.  You can boil the bag or leave it on the counter to thaw.  This will store well for about 6 months in your freezer and will get you through the winter until you can harvest your early spring Kale.

Tomatoes are just ripening

The tomatoes are just ripening on the vine and by the looks of it, I will be very busy after the long week end making salsa.  By then, the peppers and some onions will also be ready.  I am also a big fan of fresh salsa and will make some with my sister when she visits.

Beefsteak Tomatoes


jalapeƱo Peppers


Pumpkins


Some Visitors to the Garden
These are just a few of hundreds of daily visitors to the garden.

Clearwing Sphinx Moth - This moth looks just like a bee.  It hovered and then landed on a leaf near our snowflake virbunum bush.  This moth's larvae will eat the leaves of a number of different bushes but according to what I have read, it is not a pest.

Common Red Soldier Beetle - this beetle was photographed on 'Hatties Pin Cushion' plant in my side yard.  They feed on aphids and slugs so you really want these in your garden.

Spiders - are in every garden and are beneficial by catching all kinds of bugs.  The one below was rescued from our pool with about a hundred little babies on its back.  What a neat experience watching these little ones collect themselves on the back of its Mom

Butterflies - these nector lovers provide beauty to a garden so provide them with colourful places to visit. The marigolds throughout the urban garden along with echinacea and other blooms attracts many varieties.


Thursday, July 3, 2014

Beetle bedlam and Canning!!!

Beetles, other than the lady bug and soldier beetle (family of the fireflies) variety are never a good thing in your garden. Today, I went through all the squash/pumkin plants to find beetles....it didn't take long before I found the cucumber beetles in the male squash plants and the Japanese Beetle on the sunflower blooms!!!  In addition to these pests, this is the time to find leaf jumpers and insects like weavils and other such beetle-like insects that have a probiscus much like the sucking tube on a mosquito that are designed to suck the juices from leaves and young shoots. 

Keep a healthy garden by disuading mold and mildew growth by allowing distance, light and breezes to move between plants, planting companion plants and use other plants that lure away the pests that diminish your garden harvest.  I have learned to be very diligent and to pay close attention to leaf damage, wilt and yellowing of lower leaves and allowing the garden to dry between waterings.  Remove any yellow leaves and other matter that can be composted unless you see a pest like the leaf miner, which you will deposit in the garbage.

The Ontario government site indicates that Starlings love to eat the Japanese Beetle and it might explain why there were so many in my yard over the past few days.  Despite the bird feeder in the neighbor's yard, they were busy in my front and back grassed area.  When we were putting the garden in and I was going through the sod, any and all grubs were removed and physically crushed so as not to spread the problem.  Many of my neighbors were experiencing grub problems and purchased nematoids to combat them.  

Other items of interest include; just allowing the grass to dry up in the heat thereby baking the surface clay in a hard crust making it impossible for the grubs to feed on new grass shoots and roots, spraying with a concoction made of cola, beer, lemon soap and lemon scented ammonia and spraying the plants..... see below.

My neighbor's concoction is based on a recipe he received from a TV program many years ago....he has been spraying his lawn with the tobacco juice and soap...his lawn is enviable!!!  I just might try this recipe!!  Another great link for caring for your garden and specifically for ridding your garden of pests while attracting beneficial insects is....
http://www.sparkpeople.com/resource/nutrition_articles.asp?id=1324


Japanese Beetle photo courtesy of:  http://www.highmowingseeds.com/blog/controlling-japanese-beetles-in-the-home-garden/

I located two of these on a mature sunflower head.  I tapped them into a cup of oil and within a minute they were dead.  

Cucumber Beetles   
These Yellow and black striped beetles were found neatly nestled into the large orange flowers of the male squash plant.  These Beetles are not friends of the cucumber or squash patch.  I had to look inside the flower to find the beetles mating.  I used a jar filled with oil and tapped the flower over it.  Flower after flower was inspected for these pests.  This is a good example of a physical control of garden pests as long as there is due diligence in the morning and evening to find and remove them.
 
POLLINATION
While I was out relieving the flowers of their pests, I was taking the opportunity to pollinate the female plants.  The female plants have the immature fruit formed just beneathe their bloom called an ovary.  I used a soft bristled brush to take pollen from the male and deposit it on the female plant.  It worked better removing the male stem and brushing it directly on the female parts within the flower.  There were a few 'fruits' that had formed but had expired because they were not pollinated.  Today, just as the flowers are opening....it is overcast and no flying bugs, other than the odd white cabbage moth which you don't want in your garden.  Missing this opportunity means no 'fruit' to pick.... just a lot of vines.  I will have to be diligent in pollinating the plants to get them to produce.... thankfully, I have a good mix of male and female flowers.  If I didn't, I would be asking my neighbor Sean across the street for help.  He has actively looked into how to pollinate and by the looks of it... he has done a good job!!  I have removed all of the fruit that did not get pollinated and placed them in the compost pile.  The flower petal and male stem can be eaten.... high in bioflavins, it is a true anti-oxidant.  You will know that you have properly pollinated all of the female receptors in its flower when the fruit beneath begins to grow rapidly thereafter.  At this point in maturity, it is hard to tell one squash variety from another as they all seem to have the same appearance.

Cucumber flowers are smaller and you will need a soft brush to pollinate these ones.  I tried removing the petals and polinating but both male and female parts are recessed into the flower base instead of protruding like the squash.

I found an interesting You Tube video with John.  Although he is a little quirky, he has some pretty great information....   

Another interesting page that shows the importance of timed planting, bees and know how 

http://gardensouth.org/2011/06/15/evaluating-squash-pollination/


CANNING
I was picking out a beet from the garden and noted the size.... it was a signal that I should pick the large beets peeking above the surface of the soil and harvest them for canning.  Let's talk about preserving what you will need to start and some equipment/materials that I always have on hand.


TOOLS:  wide mouth funnel - fits perfectly in the canning jars, tongs with heat resistant handles, a magnetized wand for picking sealing lids out of boiling water and a depth measuring tool.  I have this kit and have used it for almost 10 years from Bernardin.  The snap lids and rings are used on many of today's modern glass canning jars.

BASICS
The basics in my kitchen are comprised of items necessary for creating a great pickle.  The cheesecloth is used to help drain out excess water when I make relish.  Latex Gloves are a must have when pickling items like beets or if your hands will be constantly wet.  I will often use these inside rubber kitchen gloves to keep the heat of peeling hot beets from burning my hands.


I use the 'Basics' for making pickles.... the cheesecloth is for putting the pickling spice in and using an elastic to close the pouch with and for straining the excess brine out of the diced pickles or peppers used for relish and jellies.  Gloves are for protecting your hands from moisture and heat.

JARS JARS JARS.....

1. antique jar from Italy (brand unknown), 2. Le Parfait (1L jar made in France), 3. Bernardin (1L jar of which I have many), 4.  Antique jar (unknown), 5. Atlas jar (this one came from grocery store 'Classico Sauce'), 6 Mason (500mL - well known standard glass preserve jar), 7.  Fido (made in Italy) with a chalkboard sticker.

GETTING STARTED:
Preserving anything requires knowing how to get started.  Here is a great clip showing you the beginning essentials.

Le Parfait has a great site for helping you prepare for your first foray into canning or using jars with the spring clip.

http://www.leparfait.com/how-to-make-your-own-preserves

LET'S BEGIN!!!  

1.  Get the essential tools out and make sure they are washed with soap and water and clean.  I have a stack of fresh clean cloths nearby which will be used for drying and to be placed on the counter where the cooling hot jars will rest. I also use my dining room table covered with cardboard and cloth to put the hot jars until they are cool and ready to store after pickling and hot-bathing.

2.  Get the Canner and jars prepared.  The hot bath method is applicable for both kinds of jars used and I use the stovetop canner to hot bath the preserves after canning.  The heat and timing are similar but always refer to your recipes and what they call for.  Follow all directions carefully and ensure you test seals.  Using the snap lids will let you know that the jar is sealed by making a 'snap' sound when the jar cools and the vacuum is formed.  Improperly sealed jars will allow the food to spoil.  Do not get discouraged if you have a preserve spoil..... I have had epic fails in the kitchen by foregoing hot bathing, not long enough or not submersed enough..... it takes practice and experience but once you get the hang of it and are organized, your garden produce will be preserved for those days in the winter when you need a little canned sunshine!!

STOVETOP CANNER
 In the photo below is my stovetop canner with a demonstation bottle.  The insert will hold 7 bottles of varying sizes up off the bottom of the pot when it is properly seated in the boiling water.

The jars, when seated at the bottom, should have the water level at least a few inches above the tops. REMEMBER, the more jars you put into the pot, the higher the water level.  If you need to remove water, simply use a Pyrex measuring cup or if you need to add water, do so with hot water from a boiled kettle (I always have one of these on standby!!  It takes a long time to boil the water in a pot this size, so put it on the stove to boil while you pull together the ingredients you will need to make your canned goods.  I also put all the jars I need and extra ones in the dishwasher (no other dishes because of food particles on them) and put it on the sanitize setting.  Metal snap lids can be placed back to back in each of the cutlery sections and contained or put into the canner when it begins to boil (the magnetic wand is used to retrieve the lids in the boiling water).  Keep the jars in the dishwasher until they are ready to be used.... I use mine hot right off the rack.  This way I know they are sterile.  If you do not have a dishwasher.....after gently washing with soap and water,  rinse with hot water and put the jars in the canner.  They can stay in the hot water until they are ready to use.

3.  KEEP CLEAN  Keep a neat and tidy workstation at all times.  I have a double sink with one side filled with warm soapy water and the other one with a drying rack.  Dishes used for mixing and canning tools get sticky, messy and can stain the counter tops.  Just place all dirty dishes and utensils/tools in the sink and wash them when the jars are in the canner for hot-bathing.  I also have a wash cloth for wiping down surfaces.  Cleanliness in this environment will assure a good finished product free of contamination.

4.  ORGANIZE FOR EASE OF CANNING.....I have a counter next to the stove.  I place my cooking pot on the burner next to the counter.  I will use this burner to prepare the recipe to be canned so I can ladle the product directly into a jar placed next to it (I use a wooden cutting board covered with a cloth to catch spills).  The jars will still be hot from the dishwasher - place the funnel into the jar and use a steel ladle to ladle the contents of the pot carefully into the jar.  Once you have filled the jar according to the recipe's directions (use the measuring stick), place a sealer lid on the jar and tighten using a ring.  You only need to hand tight and not man-handle the snap lid sealing ring.  ALWAY USE THE TONGS WHEN MOVING HOT JARS.  THE CONTENTS OF THE POT WILL CAUSE PAINFUL BURNS IF SPILLED.  Part jar can be place in the fridge and used within a few days.  Do not try to hot bath a part jar... it will not work.

5.  HOT BATHING - each recipe is different but I will hot bath my jars almost always.  Lesson learned on those recipes that did not get a hot bath....lots of tears when you find most of a large batch has spoiled.  Make sure the water is boiling when the jars go in and continue to boil throughout the process.  Pressure canner timings are different, always follow directions.  Le Parfait uses a pressure canner and will have those canning times.

6.  COOLING OFF - make sure you do not put your jars in a cold spot or where there is a draft. The process will be prematurely halted and a good vacuum may not form due to a buildup of condensation inside the jar and on the rubber seal.  I place the hot jars on top of cloth covered cardboard on my dining room table in the dark.  Do not tighten the ring - it will loosen up with the cooling process. As the jar cools, you will hear a snapping or popping sound.  This is the lid being pulled into the jar and creating that vaccuum as air escapes around the seal.  You will notice that the lid is now concave and cannot be pushed in.   Be patient!!  It is a very slow process, so allow it to do it on its own time.  

7.  COOLED Those jars that did not seal (double check by trying to lift the lid).  if you cannot lift the lid without prying, the jar is sealed.  If the jar did not seal, you can try to hot bath it again... make sure the water covers the top of the jar, is boiling and stays for the entire time indicated on the recipe.

7.  STORAGE - I store my jars in a pantry with doors that close and keep them in the dark.  Some people remove the rings (they will loosen as the jar cools) but I choose to leave them on.  You can store the jars upside down to keep the top of the product covered in liquid.

DO NOT REUSE THE SNAP LIDS.  The seals for the snap lids are thin and designed for one use.  A friend of mine tries to get multiple uses but lost a large batch and has not done that since.  Seals for the clamped lids can be used over again until it begins to show wear and tear or become stiff and unpliable.  You will save yourself a lot of grief if you inspect carefully before using.  You can re-use the rings as they are only used to hold the lids down and do not come in contact with the canning product.  You can purchase just the seals.

BEFORE.....

After!!!  I can eat these beauties in about 48 hours.  Recipe thanks to Jean Pare 'Company's Coming Preserves'.  I highly recommend this preserve book for those just starting out and for those who love to add to a basic recipe.  
http://www.companyscoming.com/cookbooks/original-series/preserves/1/PR/
I always like to support our Canadian Authors so I will not be posting her recipes on my blog.  I have, however added or changed to accomodate my tastes from her basic recipes of which I will share.  I think of this book as my bible and write all my amendments and observations on the page.  I still love paper!!


As we go along over the next few months, I will document the steps using pictures and tips written on the pictures so you can see and read what is going on.  Now would be a good time to pull together your shopping list.

1.  Buy the tools or borrow from a friend if you are not sure canning is for you
2.  Buy the book or borrow one from the library or internet
3.  Buy jars or yard sale or friends - they come in many sizes, shapes and styles and are available almost everywhere.  My first jars were given to me.
3.  Canning pot - my mother in law gave me this one - post on FB or Twitter or Kijiji to see if there is anyone looking to 'donate' or sell
4.  Labels - make your own, purchase some - blackboard or paper stickers 
5.  Big cooking pot or dutch oven or deep frying pan to cook in
6.  Apron - make, borrow or mcguiver one to protect your clothes
7.  Oven mitts, kitchen gloves, cloths 
..... any anything else.... like a good friend and possibly a glass of wine while chatting over processing your harvest!!!

Next week.... another look through the garden to see what's in and what's not!!  A few pics of gardens from friends.... 

Sunday, June 29, 2014

What's in bloom??

Its hard to believe how just a few short weeks ago you could see the earth between the plants.... now I am thinning out between plants to make room for the maturing and quick growing ones.  I have lots of interested visitors asking great questions about what I am growing and how I am growing my garden so well.  There are a number of people interested in creating their own gardens.  Do you need the kind of space I have to grow what you need?  The answer is no.  I have dedicated this blog entry for all those who grow in small spaces, whether they are in an apartment or have a small back yard.  But first.....

A small visitor is cleaning up!! (Elongated Ladybug)

This is a very active visitor and honestly, it took a number of tries before I could get this creature focused and photographed!!  I have never seen the elongated ladybug and this year that is the only variety I have seen other than the occassional chinese beetle.  It is happy flitting from one leaf to another and seems to be attracted to the leaf miner.  Last week's blog showed the leaf miner and the amount of damage this causes to the plant.... they bore throughout the plant's cellulose destroying the plant leaf.  I have been diligent in removing the spoiled leaves and tossing them in the garbage - do not compost these!!!!!!  If you do not remove the leaves and dispose of, they will lay their eggs in the soil and begin the process all over again.


What's flowering??
Lots of blooms around the garden including the tomatoes, peppers, squashes, pumpkins and potatoes.  The squash plants are growing well and all over the trellis.... some have pushed their way out of the beds and are running along the paths!!!!  All in all.... the heat and humidity this week have spawned many colorful blooms in both the perennial and the vegetable garden!!!  Welcome to summer.  The slow to start potato plants are growing in leaps and bounds this past week.  We have filled up the boxes and put on the next two layers of boards to encourage the vines to create the potato tubers to the top of the above ground box.  


Keeping the garden fed and watered.
A humid hot day will dry out a garden relatively quickly.  Keep pruning sucker leaves from the tomato plants and trim out leaves in the 'cooler' parts of the day - early morning or late afternoon.  I use the water from the rain barrels and water deeply 1-2 times per week.  Try to water during the cooler part of the day to avoid evaporation.  My neighbor freaks out when she sees me watering in the late afternoon but I have had no issues with doing this.... I just make sure that I water the soil and not the leaves of the plants. Make sure you have a granular plant food specific to the plants you are feeding.  These are time released nutrients perfect for the constant demands of the plants.

Be diligent in removing unnecessary plant leaves or leaves subjected to leaf miner or worms to allow the fruit of the plant to receive the nutrients instead of leaves you cannot eat.  Tomatoes and Brussel sprouts fall into this category.  Brussel sprouts need to have the leaves trimmed off and only allow the top leaves to remain in order to feed the plant.  I have many small buds forming in the joints where the leaves used to be.  These plants will be harvested in the fall after the first frost.

Physical pest control:  refers to the physical removal and disposal of pests. This is the best way to control a possible invasion.   Carry a can filled with vegetable oil if crushing them is not an option.  Simply place the can under the leaf with the pest or caterpillar and tap the leaf until the pest falls into the container.   If you are diligent, you will have a healthy pest free garden without using any pesticides.

SMALL SPACES 
I often hear the excuse of 'my place is too small' for a garden.  Vertical gardening is seeing an upswing in popularity and especially with those living in close confines such as apartment living and condominium.  I asked my friends to email me with their gardens to give you an idea of how beautiful and useful they really are.

Radika lives on the 3rd floor of an apartment complex with a tiny balcony.  This has not stopped her from growing the rich reward of herbs she cooks with and tomatoes she uses in her traditional recipes.  Of course flowers are also an important addition to her small container garden.  Her daughters are able to learn to live green and enjoy the summer colours from the vantage point above the parking lot.  Nice work Radika!!!  The advantage of balcony gardening means she doesn't have to worry about the invasive squirrels, bunnies and chipmunks that us ground dwellers have to consider!!!


Mary and Wendy live on the second story of a house and have a small deck overlooking a parking lot.  Their outdoor space is relatively windy and so they had a small wall constructed as a windbreak and a sunshade to keep the heat off the deck.  They have chosen to grow tomatoes, peppers and herbs to use for cooking.  The flowers add colour, privacy and life to a wonderful entertaining area under a shade cover.  The railing boxes with the trailing flowers add depth, interest and a wind break on the deck.  It looks great!!!


In my Urban Garden:    Creating a strong attractive trellis
I am reminded when i see the giant leaves of the unknown squash plants in the garden (not marked from the student's plantings and an accident with my greenhouse tipping over and all the containers and tags getting scattered) that we will need a strong vertical support system for the quick growing plants.  Today it is 40 degrees C with the humidity making it great for these growers but not so great to work in.  Max and his brother Paul have painted and attached the horozontal cross members at the top of the trellis to support the weight of the plants that are climbing quickly.


Growing out of the beds.... 
I have pulled the deer fence down that surrounds the individual beds and allowed the vines to grow along the path and along the fence itself.  We will have to secure the fence enough to take the weight of the squash and cucumbers.  Max and I will change the fencing structure for next year's garden by allowing a path around the entire perimeter of the garden.  What is really cool about the fencing is the marigolds growing right through them as if they were not there at all!!

Potato boxes are complete....
This incredibly fast growing potato vine has grown to the top of the box.  I will paint the sides when I get a chance.  The flowers are getting ready to bloom!!!  We started out with 5 seed potatoes in each box and only two sprouted in one box and one sprouted in the other box. 


Composting near the front beds....
A friend just dropped off two composters.  I am giving one to a good friend for her garden and I am keeping a smaller unit just beside the Wegiela up in the front garden bed and next to the rainbarrels.  How convenient!!!!  Now I don't have to go all the way around to the back of the backyard to dump the front garden green waste!!!


We will continue to update our observations as we continue to grow and harvest our crops.  I often wonder what would happen if our neighborhood decided to create their own urban garden.  We could feed the neighborhood and trade off produce.  I am growing tons of tomatoes but no zuccini...which I totally love.  I have some squash and other items to trade and it would be nice to trade with someone close by.  

In our bowl at dinner.....
Here is a great collection of greens and of course a beet.... I juice this in the morning and have a salad for dinner!!!  The peas are so sweet and tender that you can eat them in their pods!!  I use a pair of scissors to cut everything from the stalks in the garden and then into the salad bowl after washing in cold water and spin drying.  Kids can easily help out in the kitchen when they can use a pair of scissors to cut the leaves into bite sized pieces.  Beet tops can be cooked, juiced or simply added as additional greens into any salad.  A simple home made salad dressing et voila!!!


CANNING
It should be just a few short weeks before we begin the process of picking our first tomatoes, peppers and possibly onions for preserving.  I have ordered some Le Parfait canning jars & replacement seals from the 'Crate and Barrel' in the United States and 4 Fido Canning jars from 'Solutions' store in Maisonville.  I normally use the Mason jars and have quite a number of them but using the old fashioned canning glass with the metal clip hold downs does not require hot bathing the preserves.  I will have recipes and a how to use each of the different types of canning jars and tools.  This summer I will be hosting a tutorial in my home on how to can garden goods with some of my dearest friends.  It is always better to can with a bunch of gals who can share the work and the finished product!!!

FREEZING
We recently purchased a 'FoodSaver' for packaging berries and other garden pickings to store in the freezer.  I will also be using it for the Apple Sauce I make.  A few years ago, I lost most of my canned apple sauce due to a number of lids that simply popped over time due likely to the contents not being acidic enough.....  I have decided to just vacuum seal the apple sauce and freeze it.  Vacuum sealing prevents frost buildup and of course oxidation of the produce.  This unit also came with a sealing system for bottles which is fantastic!!!  No air, no oxidation.... so I use this vaccuum on my opened wine bottles so they do not spoil.  I suppose I could just drink the whole bottle?

Next week in the garden....

Checking on the progress of the veggies and what's new to harvest....

A canning checklist to help you start your own canning.  I have learned to always be prepared in advance instead of running around last minute to find what you are looking for!!  This is an excellent time to call your mother or friends and ask them if they have any to donate.....yard sales and even thrift shops have been known to be good resources.

Happy Gardening.  You can contact me through my google account or leave me a comment/question.

Monday, June 23, 2014

Composting your garden waste

Composting your garden waste
We noticed over the past few weeks that there was an abundance of fruit flies in the compost.  You want to feed your garden and not encourage pests to thrive in your garden unless they are beneficial.  We pulled up our compost container, sifted through what was inorganic (yes, there were plant tags, bottle caps and an assortment of plastic) and what was a good organic to compost.  We dug down about 1 foot using the garden claw/shovel and then sat the composter on top of this.  We then anchored the composter down using the holes provided in the base with long plastic nails and used some of the composted earth around the edge to prevent animals from getting in.  We only want to encourage worms to break down the materials. We then put the composted soil back into the composter and mixed it with new compost.

Compost is beneficial to the gardens by providing it with minerals that have broken down and become earth.  We use this to top up our gardens throughout the summer.  Materials that can be used in the compost are covered in one of our earlier posts.  Remove the compost from the bottom access panel. Compost is ready when it is a rich black colour without the smell.  

Composter should be located in a sunny spot and one that is easily accessible to your garden and to the house.  Do not locate too close to the house because it will smell while breaking down organic materials and might attract vermin.  ( do not put any meat or dairy products in the compost).  You should mix your compost regularly.  We have a garden claw that works great!!


Do not compost any vegetable matter that has a living organism eating the leaves - these can be layed out on a hot surface such as the driveway and put into the garbage.  This will prevent a spread that will destroy your garden veggies.  This leaf miner shown on the Swiss Chard leaf is one example.  Remove any leaves with this immediately.  Be diligent and this physical form of pest control will pay off.  If left, these pests will return to the earth and be ever present for many years to come.

What's in season to eat??
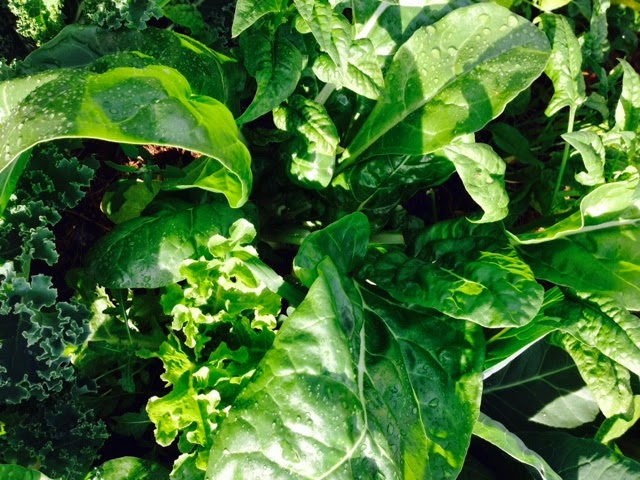
This week, the spinach is coming to an end with the plants going to flower/seed.  I have clipped off these flowers throughout the preceding weeks but have decided that since I have lots of lettuce, Swiss Chard and Kale sprouting that I would let the spinach and Arugula go to seed for the fall planting.  In most cases, these seeds will be sprouting in the early spring when the frost is out of the ground.  No worries, I have already planted seeds that will produce more bounty in the fall.  If properly cold-framed, these cold loving plants will grow all winter in a protected garden.


Beets
I am just thinning these out and using the smaller beets for their leaves and the bulb to juice with.  I really adds a nice sweet flavour to my moring juice.  Beets are ready to harvest from now until mid-summer.  I have planted more beets to harvest in August when I begin to can for the winter.


Rhubarb
This lovely Rhubarb plant is growing well and in time for the late June strawberries.  You will always find these ready to pick within the strawberry growing season.  Do not eat the leaves - these are poisonous!!!!!!  You can use the leaf juice as an additive to a soapy water pesticide.


What's coming soon.....
Peas 
These are growing fast and the next two plantings will catch up soon.  I had planted seeds for two additional crops.  When the first one comes off, then it will be time to harvest the next one.  


Tomatoes
I have clipped all the sucker stalks off of the tomato plants.  These are all the leaf branches that form from the base of the plant and all along the stem.  They draw water and nutrients away from the fruit, so you want to remove these with a sharp pair of scissors.  I have found that all the down facing branches can be removed a few centimeters from the stalk.  You will see a second stalk form that grows upwards - these produce the flowers that become the fruit.  Be diligent and remove as many suckers from the plant.  Leave the top leaves on which will draw the water and minerals to the top of the plant and these are closest to the life giving sun!!!


Peppers
These lovely productive plants are really putting out the flowers now and small peppers have begun to form.  These plants will need to be watered at least 2 times a week and thoroughly as they need the water to produce big peppers.  The tomato ladders have been put into this bed to provide support for the plants and to keep them from swaying in the winds that often course across the garden.  Some suggestions are to plant a wind break to stop them from swaying.  These plants show maturity and a readiness to produce flowers when the branch stalks turn a dark black colour at the joints. 


Celery
This is coming along well and has turned a beautiful dark green.  No matter that it starts out as a seed or is a cutting from the grocery store, this plant grows well amongst the carrots.


What's coming later in the season?
Brussel Sprouts
These slow growers are putting out the buds for the sprouts and I am trimming the leaves beneath them as they begin to form.  Same idea as the tomatoes.  You want the energy to be put into the sprouts and not into the leaves other than the upper ones.  Once the plant gets to the ideal height... yes, they can get really really tall, you will remove the tip of the stalk.  This will keep the plant at the height you want.

Cabbage
I found a pupae still in its silk sack hanging under the cabbage leaves.  I removed this and destroyed it to prevent the insect from devouring the cabbage as it grows.  Physical removal works really well and should be done when these voracious eaters are found.  A garden requires constant care throughout the growing season to ensure a good crop. You can see the leaves beginning to fold in to create the head of the cabbage.


Carrots 
Carrots are still really small.  They tend to grow their leaves super tall and then the root beneathe grows.  These are slooooow growers like the Celery beside it.  You can see just a little frill of carrot tops beside the celery.


Squash and Cucumber vines
These are growing well and are now beginning to produce flowers.  We are training them up the trellises in the front urban garden.  I have melons like cantelope growing in the front flower bed for interest and of course, the lovely blooms.  The deer fencing will come in handy to protect these while they grow in the garden.....although, I never had any problems with them growing throughout the perennials in the back garden.  These will be ready in the late summer to late fall.


Attracting beneficial insects 
A garden needs bees, butterflies, lady bugs and birds to visit your garden.  The more attractive your garden to them, the better your crops will be pollinated and cared for.  Early this spring, just when the dandylions were sprouting, the neighbors were waging an all out war to rid their lawns of these pesky 'flowers'.  BEES love these 'flowers' and once they have come to visit your early blooms, they will be back later to visit your crop blooms.  The bees this year are HUGE and hungry!!  grow flowers like the marigolds in your veggie beds and other annuals to provide your perennial gardens with blooms all season long.

I love ladybugs when I see them in my garden and this year, there are plenty of the little red/black polka dotted wonders.  These are voracious eaters and are always on the lookout for aphids.  I did notice this year that their shells look a little elongated and not the typical round shape.... I wonder why....  from what I have researched, these are in fact elongated ladybugs... of which I will attempt to get a pic of.  In the meantime, remember, ladybugs start out as nymphs... so here is a pic of one so you do not confuse it as a pest.

Butterflies love cone flowers and many other blooms in the garden.  There are a number of great sites you can visit to learn more.  
http://landscapeontario.com/butterfly-gardens-can-be-elegant

Birds of all kinds love to eat the seeds from the sunflower - especially the finches.  They also love the cone flower (echinacea) and any other flower, such as the thistle, that provide seeds.  I leave these in the garden all winter long to help our feathered friends and then remove them in the spring before the plants begin to grow again.  Grasses as well look amazing in the winter, provide cover and seeds for our feathered friends.  Just remember, birds also love berries and if you want to keep them to yourself, you will have to net the plants.  Drape the netting so that it is far enough above the fruit to prevent winged invaders and tight enough so as not to entangle them.  

Yesterday, we had a large winged visitor attempt to visit our fish pond in the back yard.  The Heron is an exceptionally big fish predator who can spot the flash of gold from way above in the skies.  We live in an area often frequented by these predator birds and they can easily remove all your fish in a flash.  I refurbished a wooden statue of a King Fisher and used an outdoor sealant on the wood to preserve it. The 'bird' sits beside the pond in clear view of other predatory birds.  This usually works to disuade invaders as both species of birds are territorial and lone fishers.  It also helps to provide plenty of hiding places for the fish such as these pond lilies and sentinel plants.  There are also dwarf bullrushes and iris along one bank of this small backyard pond.  


Pests in the garden
Most notable of these are the squirrels and rabbits!!!!!  We did put up the deer fencing all around the garden but what we neglected to do initially is secure the netting to the ground and so these critters were going under the fence.  Tent pegs cured this problem.  I also put bunched up deer fencing at the one entrance I use to enter the enclosed garden.... the animals seem to know that this is just plain dangerous and getting caught in the netting is not an option.  The rabbits do not fear us in the least.  I have let the clover grow next to the garden where they graze happily while leaving my garden alone.  Given an easier food source helps!!!!

As promised, here is a photo of our backyard taken from the deck....


Ecology
We are always looking for ways to conserve and save energy.  We use a rainbarrel, composter,clothesline and a solar heater (pool).  

We are currently looking into 'Pure Energy' which is a government sponsored solar panel project for our home.  We just recently submitted photos of our interior roof and electrical service.  We will keep you updated on this.....

Try to reduce, reuse and recycle as much as possible.  Save your nursery pots and either re-use them or bring them back to the nursery you purchased your plants from or put them into your curbside recycle bins.  Use mulch in the garden.... can't afford a large delivery?  Use grass clippings instead of mulch.

We use plantings and umbrellas (back deck) to reduce the sun shining on the house bricks by using ivies that do not damage the mortar or bricks (Endelman Ivy).  This Virginia creeper can grow at an astonishing 30 feet per year once established.  This creeper is 4 years old.  I have one on three sides of the house... the varigated is on the front wall and in the fall the lime green leaves will show as bright pink and the darker green show as red.  I keep the ivy off the siding and just train it along the brick.  If it gets to tall, we simply clip it off using a telescopic pruner.


Next week...... we begin planning the canning event hosted at my house.  There are a few of my friends who are interested in canning their veggies and making pickles.  A few weeks ago, I made Jam with the strawberries I purchased at Heeman's Greenhouses and Strawberry Farm (East end of London, Ontario).  Here is the recipe I used:

Strawberry Jam
4 cups of crushed strawberries
7 cups of sugar (I used organic unprocessed cane sugar from Costco)
1 package of Certo (used the liquid pectin)
1/4 teaspoon of butter (this is used when the rolling hot jam creates that pink foam - butter reduces it)

Directions are directly from the Kraft site:
http://www.kraftrecipes.com/recipes/certo-strawberry-jam-52127.aspx

BRING boiling-water canner, half-full with water, to simmer. Wash jars and screw bands in hot, soapy water; rinse with warm water. Pour boiling water over flat lids in saucepan off the heat. Let stand in hot water until ready to use. Drain well before filling.

STEM and crush strawberries thoroughly, one layer at a time. Measure exactly 4 cups crushed strawberries into 6- or 8-quart saucepot.

ADD sugar; stir. Add butter to reduce foaming. Bring to full rolling boil (a boil that doesn't stop bubbling when stirred) on high heat, stirring constantly. Stir in pectin. Return to full rolling boil and boil exactly 1 minute, stirring constantly. Remove from heat. Skim off any foam with metal spoon.

LADLE immediately into prepared jars, filling to within 1/4 inch of tops. Wipe jar rims and threads. Cover with 2-piece lids. Screw bands tightly. Place jars on elevated rack in canner. Lower rack into canner. (Water must cover jars by 1 to 2 inches. Add boiling water, if necessary.) Cover; bring water to gentle boil. Process 10 minutes. Remove jars and place upright on towel to cool completely. After jars cool, check seals by pressing middle of lid with finger. (If lid springs back, lid is not sealed and refrigeration is necessary.)


Wednesday, June 18, 2014

How my garden is growing!!!

Protecting your produce using barriers

This past week, I discovered a rodent had dug up a few of the leeks despite the fact that we had surrounded each of the beds with 1 foot high  of deer fencing stapled to the boxes.  After a second visit, I simply ran a 5 foot deer fence all the way around the garden.  This flexible plastic fence still allows me to pull it down to pick the veggies.  It is hard to see it since it appears to be almost invisible.  I have tied green ribbons on the top along each side of the fencing to let critters know that there is a barrier.


The raspberry canes are just off the front porch and protected with 'cages'... one is a willow basket and the other is a chicken wire.  Animals such as squirrels and chipmunks are abundant in our neighborhood and can be quite damaging to any plant it sets its scope on.  


The walkway is truly lovely and is a welcoming entrance to our home.  It was a great choice as it reflects all of the colours in our brick.  The flowers are beginning to grow nicely along the curves including the Rhubarb located just as the path begins to curve.


Here is a Hibiscus which I overwinter in the house.  It is now full of blooms and is a lovely focal point on our porch.


Garden Bed
The front garden is filling up fast with many perrenials and annuals for continuing blooms.  The columbine blooms have been clipped before producing seeds in order to keep the plant producing more flowers throughout the summer.  The dwarf lilac has finished its blooms and I have snipped those off to encourage growth for next year's blooms.  It sits near the corner of the step and has enough space to grow to its maximum height of 6 feet and 6 feet in diameter.  Always take into consideration what the full growth of a perrenial will be so you don't plant it too close to other plants.  Fertilize with a good perrenial slow-release formula in the early spring and mid summer for maximum growth.

Throughout the garden and around the back garden, I have flower pots filled with geraniums and a myriad of other all-season bloomers.  Geraniums are a happy flower who like to have their spent blooms removed.  Simply remove them at the point on the stalk that they grow from.  support the stalk while removing the spent bloom by pulling it away gently. 

Pruning 
Since our winter was incredibly harsh this year, I had to do some radical pruning of the decorative bushes in the front and rear of the house.  

The Vibunum bush (snowball) was once again infested with the Virbunum beetle.  This small beetle will lay its eggs after boring a hole into the wood of the tree and then fill it with excrement.  The beetle larvae will hatch and the voracious worms eat the leaves of the virbunum creating a lacy look that can involve a few branches in the first year or the whole bush within a few years.  Looking for circular 'scabs' on the woody parts of the tree in the early spring and 'bent' end branches are signs of an infestation.  It is far easier to prune and discard these branches and stalks before the tree leafs than it is to wait and try to deal with them as they eat away at the plant.  Some of the trunks were sizeable 3 or more inches in diameter.  These need to be removed a few inches above the base of the tree.  I noticed that the entire length of the old wood had been bored into.  The bush had to be radically cut and all but a few branches on the tree have remained.  No worries though, this bush will come back stronger over the next two years and produce large white balls.

The Weigela bushes suffered through the cold extended winter and the bush in the front garden bed only had a few viable branches left.  I kept these in order to allow it to bloom but then removed all the other woody branches just above where new shoots were forming.  These bushes should be trimmed yearly to remove branches at the base that are larger than 1-1.5" wide.  This allows the bush to renew itself and grow stronger each year.  Remove all dead branches and make sure you allow for the center of the bush to be open enough to allow air movement.  A good fertilizer and fresh soil around the tree will encourage healthier roots and more blooms in the fall.  Our Weigela bushes bloom twice per season and the hummingbirds love visiting them.

The Forsynthia tree was looking far too leggy after improper pruning over the past years.  This is an easy remedy - remove all trunks over 1.5" wide to just a few inches above grade.  A radical pruning, which is what we did this year means that all trunks are cut to a few inches above ground and all new shoots are left to grow.  This beauty will flower in the spring and this time it will resemble a bush and not a leggy tree.

The Lilac tree in the back garden is spectacular but the blooms are 8 feet.  this bush can be trimmed down to a height where blooms can be encouraged to grow all around the bush.  Trimming this one needs careful consideration as this bush will set flowers in the growing season for next year.  All flowering bushes should be trimmed after they flower.  I take off all the old flower heads and remove the branches to the joint at which new branches will form.

Pruning is a necessity to encourage new growth and to get rid of old growth.

Gardens throughout the property often incorporate lots of colour and textures...and the occassional decoration in pots and in amongst the flowering beds. at the back and side of the house.  Having all this colour through the growing season is soul inspiring.


Our lovely Peonies bloom in June above the geranium perennial,  as does the Tiger Lily and the dwarf lilac.  So much colour to welcome in the summer months this week.


The front beds as well as one in the back showcase a few squash and melon plants... what survived multiple attacks by squirrels and chipmunks!!!  Only one watermelon plant survived the onslaught of a naughty chipmunk that easily made its way through the square fencing in our original garden.  Now with the Vibunum bush cut right back, the sun is able to shine into this small patch to provide the necessities for the squash, sunflowers, chive and lettuce that a few of which have sprouted from last year's seeds, including tomato plants.  I removed most of the small tomato plants which will not produce in the short growing season.

Urban Garden Pics


Lots of Kale and beets surrounded by lovely blooming marigolds.

Tomato plants are filling in so fast and look at all the blooms!!!!

The lettuce patch with spinach, Swiss Chard and lettuce

Making Tea
Last night I sat on my porch reading emails and enjoying a steeped cup of tea using the camomile blooms and Lemon Balm.  They are both growing so well.  I just picked the Lemon Balm leaves (planted in the squash bed as a companion plant) and ripped them up and then added the flowers.  I purchased a lovely ceramic tea mug with a large open screen perfect for steeping tea.... It was a lovely way to end a hot and muggy day in the garden.  Remember to use your herbs by making teas or adding to your salads.


Juicing
I love to juice fresh Swiss Chard and Kale.  There is nothing better than the sound of fresh picked greens and I have to say, the greens in the garden are not bitter at all.  The grocery store purchases pale in comparison with the beautiful green and the crisp texture of a plant picked in its prime.  I juice together the following in the morning.  This is my breakfast....

Swiss Chard - 8 big leaves (pick the outer leaves of the plant - these are bigger and older and allows the plant to produce more.
Kale - snap off a handful of Kale - again, choose the outer leaves of the plant.  You can continue to pick these throughout the growing season
Apple - any apple will do.... Sparta apples have a nice scent and add a flowery taste to the mix.
Carrots - two of these add just the right sweetness (can't wait for my crop to be ready)
Beet - when available.  Currently I am eating the beets that I am thinning out of the garden and using the leaves in the juice.
lemon - just a little lemon goes a long way and keeps this mix at a healthy ph level
ginger root - I keep the ginger root in the freezer and then rasp a small amount into my juice.
Barley greens - just in case I didn't get enough greens (smirk), I will mix in 3 tablespoons of greens.  

This is a healthy way to cleanse your body every day.... detoxify and feed each cell with proper nutrition.

That's it for this week..... see you next week with more recipes and pics of how our garden grows in the Urban city.  We will also talk about composting and tips to keep the fruit flies away.  We will also look at planting for the birds - feed them without buying expensive feeders and bags of food - Finches, Cardinals and Hummingbirds are just a few that visit our garden.  Also look at flowers that attract butterflies and bees!!!