Wednesday, April 23, 2014

Completing the Urban Garden

Monday April 21st

We have completed the installation of the boxes.  This has taken 3 full days and a lot of sweat equity to level each of the boxes on what appeared at first to be a relatively flat front yard.  We could not have been further from the truth!!!  That being said, the look is fantastic!!  

We have decided not to remove the sod from inside the boxes because the ground is completely clay beneath a thin layer of topsoil.  I have also discovered a number of grubs (removed from ground and pressed between gloved hands - they are voracious eaters who destroy root systems) within the roots of the grass plus plenty of healthy worms.  I have attempted to remove as much of the good soil from the roots by rubbing two pieces of sod together (earth sides facing) which worked exceptionally well.... only later i was to discover very painful wrists as payment.  I used the recovered earth to fill in the gaps made to dig in the boxes when levelling them into the ground.


Tuesday April 22nd

I am working on a number of projects today.  It is a brisk but bright morning, a sharp contrast to the weather yesterday.  First I head out to the high school where I will be volunteering and supply teaching in the Green Industries/technical programs.  I get to look around the greenhouse and the classroom.  How exciting to have such a great program for students to explore techniques for seeding/transplanting and growing a multitude of different plant species.  

Later in the morning, I head out to visit a few local greenhouses to get an idea of how greenhouses in industry operate and how they manage plants.  Interesting that some of the local greenhouses will receive plugs - plants that have been started by seed/tuber or cuttings that the nursury will grow to maturity.  There are so many plants in the greenhouse and nursery.  The humidity hangs in the air as employees bustle about watering everything despite already looking damp.  I learned with my own greenhouse that watering often is key to a plant thriving even in a humid environment.

The afternoon sees me lining the beds with a permeable cloth that will allow water through but not weeds. The middle of the beds are lined with paper leaf bags or newspapers. We have also decided to use chicken coop wire to line the bottom of each bed and over top of the paper.   There are many rodents in our area and we hope to deter digging under the beds.  Some of the beds are shallow.  We have anchored each wire lining in place with stones until they are filled with earth.


Wednesday April 23rd

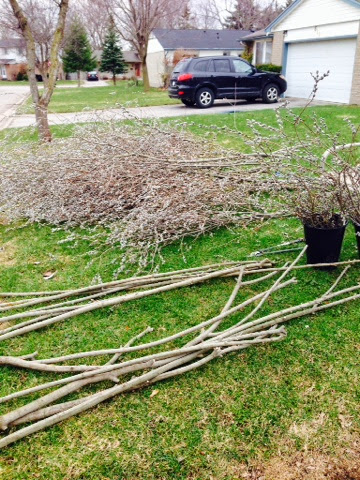
I have decided to put a trellis up on the left side of the garage to match the one on the right.  I have taken a picture and head off to Home Depot to pick up a match and then to purchase more lining cloth.  Max will be picking up more chicken coop wire.  The trellis is an exact match from the one I purchased a few years ago and the clematis that is in the original one is split in two and put in the ground once I have removed the paving stones and chips and dirt.  Clematis like to have their roots covered and shaded, so I create a mini wattle fence at the base of both trellises.

Max and I finish the beds with paper and the chicken coop wire he has picked up from our local TSE store.  He has also visited with Fisher Landscaping supplies and has ordered 6 yards of mixed soil and compost.  It will arrive tomorrow morning.

Seeding

It has been a harsh few weeks with plants expiring due to the cold in the garage after a few days of the doors being opened while we were working.  One of the trays capsized when the greenhouse was being rolled out of the way and most of the plants broke...... sad moment.  I decided that I would get the seeds sprouting using wet paper towels after discovering that a number of seeds that had been planted in starter trays did not sprout and it was a few weeks before discovering that they would never sprout at all.  So, I grabbed some glass jars and colourful dollar store parfait glasses and set to work to create markers and start the seeds sprouting.


I purchased some white shelf paper (one side adhesive) to use on the bottom of the seed pack to adhere it to the stick which slid nicely over the wide end.  The shelf paper could be written on and stuck to each of the containers.  It is important to note which seeds are which.

Thursday April 24th
We took delivery of 8 yards of mixed soil today.  It doesn't look like much in the driveway but hours later, we finally finished loading up all of the beds with soil.  The weather today is nice but terribly unpredictable with fluctuating temperatures and winds.  This is turning out to be a difficult spring to guess what needs to happen when.


Friday April 25th
I am at our local high school to talk about my urban garden and have created a slide show for the students to see what an urban garden might look like depending of what type of home you live in.  I also stayed to plant some seeds in starter trays to prepare for the sale in a month.  Later in the afternoon I planted 50 Gladiola bulbs, Day Lily, and Frescia bulbs in the front bed tucked neatly behind the wattle fence.  I placed some twigs allong the bulbs to dissuade our furry visitors.

Saturday April 26th
Today is too cold and raining.  I have to admit I am sore and tired so today is a stay in and relax day.

Sunday April 27th
A big shout out to my son who is now 20!!  Happy Birthday.  He is serving in the Armed Service so I am spending his day in our urban garden planting seeds.  I will cover all the beds in a protective black mesh, water the gardens thoroughly and then place burlap over top to keep the day's warmth in.  The seeds will take about two weeks to germinate and begin to pop up.  I have plastic to lay over the plants overnight to prevent damage from any late frost. In France, cloches were used - they looked like little glass bells and enabled a grower to plant early by acting like miniature green houses.  You can still purchase cloches but it is an expensive way to start a garden especially when an inexpensive clear plastic drop cloth can be used instead.  Its not attractive but it only will be used for a few weeks in the spring.


Pulling plants out of the garage every day to get sun!!  I have seeded more marigolds to place around the garden beds.  The tomato plants are looking a wee bit sad but they are growing now that they have longer time in the sun and under a grow lamp.


I split my clematis in half from the bed on the right side of the garage.  I purchased a matching trellis and then weaved the smaller willow branches on the base of both of them.  This helps to keep the roots in shade.  The clematis needs to have roots in the shade in order to grow properly and bloom.

Our budget and planning will be illustrated in our next installment of our blog.... in the meantime, I have plenty of work to do for other projects I am doing.

Saturday, April 19, 2014

The Easter Weekend brings great weather for building above ground boxes.

It's early Friday morning and my neighbor Craig ambles over to talk to us.  He mentions he is trimming a pussy willow tree in his back yard.  His son is creating a vegetable garden beside the tree which will cast a shadow on the bed when the leaves sprout.  I have been looking for a willow tree to use the branches for a wattle fence.  What are the chances that I would be offered cuttings so close to home? I head over to his back yard and I am thrilled to find enough branches to create not only the small bedding fence but also plenty of thicker branches to use as  supporting stakes.  The much smaller willow branches will be used to weave planter pots to decorate the front garden.  Well, Craig got rid of his branches and I got myself a lot of great twigs.

Wattle fence preparation
The willow cuttings are sorted by size and the pussy willow ends are kept on until the fence is weaved between the upright posts.  These branches will be kept in a large garbage can filled 1/3 full with water.  I need to keep these branches alive in order to keep them flexible enough to bend without breaking.  Willows love water and will root if left long enough in the water.  These can be planted to make a live wattle fence but be careful.... these trees can grow super fast.  The two small branches I planted in the backyard 2 years ago are already 8' tall and a 3' spread. Its not recommended to grow these trees on your city lawn... they could be on the banned list, so check with your city bylaws on trees.  You can clip the pussy tips when you begin to weave the fence.

Wattle fences have been made since mankind started to raise animals for food or planting beds to keep animals out.  In Cuba, fences were made with fast growing cacti succulents.  It is a great way to reuse natural materials and very inexpensive if they are given to you. 


Sorting the willow sticks on the front line and prepping them within a short time of being clipped ensures we will have nice flexible branches to work with. 

Mitch is using the circular saw to create stakes with the larger willow branches he cut to 4' lengths.

Building the above ground boxes
Max has been measuring and marking the ground where he will be installing the boxes.  He has elicited the help of our son Mitch who is eager to use the power tools.  This has become a family project and its good to see the kids just as excited as we are!!


Measuring and marking for the boxes to be installed in our urban neighborhood.  We are fortunate to have large front lawns and big back yards.  Urban gardening does not have to be just about larger yards when you consider most new homes do not have them.  Vertical gardening in those instances are the best alternatives.

The potato boxes are getting ready to be inserted into the ground.

Making an attractive and welcoming garden includes the house.
We want people to feel that they can feel welcome to pop by and talk about our project and spend some time talking to us about their projects.  One thing gardeners love most..... talking about the gardens they love and swapping tried and true tips.  Today, I headed down the road to 'Diamonds and Toads' in St. Thomas to pick up some Annie Sloan Chalk Paint TM from the proprietor Michelle.  She is amazingly talented and has some incredible ideas.  She is sending me some information on using the paint for the great outdoors.  I have picked up 2 quarts for $90.  Yes, its expensive but a true quality paint that will cover anything you need to paint with little to no prep.  It does not need special care for outdoor use and keeps its color vibrant despite heat, cold and rain.  It is easy to paint 3 coats in an afternoon.  The paint is rich and as thick as a good yogurt and is remarkable in the coverage!!!!


I use some minor prep work by washing the door down with TSP and hot water.  I rinse it off with warm water then begin taping around the trim.  Prep time about 40 minutes.


The new look using 'Emperors Silk' Chalk Pain nicely framed by the dark chocolate trim.

The potato boxes are sporting the lovely rich 'Emperors Silk' red paint.  I have a few more projects that I painted, including our house numbers above the garage and a milk can which is recieving some other touches before it heads outside as decoration for the garden.  You can see the willow branches still in the water just waiting for me to create that new fence.... can't wait to start the weaving!!!!


The first 3 planter boxes have been levelled and screwed into stakes driven into the earth.  We have another few boxes left to build.  The Wattle fence will go the entire length and curb side of the two rectangular boxes butted up to each other.  The front lawn is sloped to the road so Max will install the remaining boxes slightly higher to offset the rise in the land nearer to the house.  

Greenhouse Plants
It has become disappointing for some of the plants to have expired (tomato plants need to be warm) with the cold air blowing through the garage with the door being open for the past two days.  Although everything was tarped and we kept the grow light on, it wasn't enough.  It is a lesson learned in this new venture.  I do have a contigency plan to purchase many vegetable plants in the spring once planting season has begun.  It will be noted for next year to create a better growing area in the basement away from the cooler climate of the garage now that we have a grow light.  When I was a young girl, my Mom only seeded her garden in the early spring.  Normally I would have put the seeds in the ground in March/April but this season has been incredible challenging with the cold and snow slowing our construction by 2 weeks.  The soil will be ordered this week and I will begin the first sowing of seeds as soon as that happens.

Bulbs
I have purchased some flower bulbs which will create a colourful and welcoming environment.  These will be planted as soon as the wattle fence is built and soil put in.  We will have to make sure our furry friends can't help themselves to a yummy easy meal.

Next Week - 
Planting bulbs 
Planting new seeds
Projects to beautify the garden
Wattle fence weaving

Saturday, April 12, 2014

Creating excitement

Our neighbors have been showing a great deal of interest in the activities this weekend of Max spray painting the lawn with a bright orange can of marking spray.  He is in the process of creating the ground work for installing the beds by marking out exactly where the beds will be placed.  He has made sure that a lawn mower and ourselves will fit in between the boxes should we have to expense out costs over a few seasons.  I have been transplanting on the front porch surrounded by flats of plants and neighbors have popped in to see how things are going.  Not everyone will be on-board with your plans for an urban garden, so making it as appealing as possible and having great curbside appeal will help to dissuade fears of 'guerrilla gardening' (things just haphazardly arranged with no concern for esthetics) .  Gaining interest and encouraging discussions will also include a small lawn sign with a link to our blog....so even the shy ones can be included in our adventure or the not so friendly neighbor across the way.  Always find out from the city what the bylaws, if anything are and then comply to those.  The better your garden looks and the more appealing it is to visitors walking, biking or driving by, the better opportunity for them to start one themselves or to respect the one you have created.

Note: look up your city bylaws to ensure you are following the law and that you will not have to remove what you worked so hard to install.  Our house is zoned as R02 and as such, we have to have approximately 10 feet from the curb as the road allowance.  You should also be aware that you could be faced with a stiff penalty for trimming or killing the tree(s) without permission from the city - trees that are typically considered boulevard trees and which are within the allowance.  In our city, it could cost you thousands of dollars for an amateur attempt at trimming of which one of our neighbors is facing.  The city has arborists and are responsible for any and all trimming of trees on city property.  If you have any questions, the City Manager office will be more than happy to help.  Taking things into your own hands is just asking for trouble!!   There is also a list of banned trees in our city and if you plant them, you will have the responsibility of removing them yourselves.  When I first moved into our house, the entire back property line was planted with Hawthorn bushes!!  These nasty needle sharp thorns were a challenge to remove.  There are better trees that can be used as ornamental trees that attract butterflies, birds and beneficial insects for pollination for your garden.  

This weekend, the weather is in the double digits.  It is a great time to clean out the garden beds and pull the early weeds and plants that you do not want now that the earth is warm and wet. We have a number of large wheeled garbage containers which we use specifically for green curb pick-up and a complement of paper yard bags.  The previous home owners had planted a number of perennials and not all of them desireable.  It is a constant battle trying to curb those that spread seeds throughout the garden with the assistance of my cat and the myriad of rabbits, so it is wise to pull them early and before they get a chance to produce seeds.  This week, with the snow gone, there are a few flowering shrubs that have a fair bit of rabbit pellets beneath which indicate a healthy population and I expect they will want to visit the gardens which is part of the reason why we chose the above grade planting boxes. The pussy Willow in the far corner of the back yard has been chewed on and many small green branches have been severed and are laying on the ground which again point to the long winter and the healthy 'rodent' population. The snow banks have damaged a few smaller trees and these have been carefully trimmed below the damage and above the new buds. 

PLANNING
It is always best to create a plan and then to implement it by outlining where you expect things to be placed.  Max wanted a little bistro set to be in the front nearest to the house.  This way, we could have a coffee, work or just read the paper in the morning before gardening. We have a neighbor who has gifted us with one they no longer use.  Free is alway welcome!!  Of course, she will be gifted with some sun-kissed, freshly picked ripe tomatoes this summer as a thank you!!  We want to have more than an  urban garden, we want an experience we can share with others.  It is important to create feel good, welcoming and healthy environments.

Outlining the garden
Materials:  
1 spray can - orange marking spray
1 36" wooden stake 
String
Measuring tape


Max has hammered the 36" stake into the ground to signify the middle of the small sitting deck.  He will not only use this to mark out the round sitting deck but he will also use it as a center guide for the boxes and paths.  Max selects a length of string that will represent the radius of the circle - equal to 1/2 of the total diameter.  With one end tied to the stake and the other end tied around the spray can, Max will walk around the stake with the string taut and spray a perfect orange circle.  He shortens the string by 6" and creates a half arc at the top and in parallel with the first circle.  Rocks will be placed between these two lines and create some interest to the garden and allow for flowers to be planted.  The plants within the circle have been dug out and relocated above the circle knowing that it will rain overnight.  This rain will help to get the transplants started in their new home.  Within hours the thunderstorm hits and sends a deluge of rain to the warmed earth below.

Max has used a measuring tape from the stake to the farthest point where the flower bed will be planted to dress up then vegetable garden.  Paths will be 24" wide throughout the garden and materials are discussed.  We are using raised beds so we have many options.  Depending on how much we have in our budget, we can use anything from crushed gravel, pea stone or mulch.  Mulch is relatively inexpensive but will have to be topped up yearly.

Grow Light  ( http://www.hydrofarm.com/our-brands/jump-start.php )
Despite our best efforts to encourage growth of our seedlings, it has become clear that the weather is less than cooperative and our plants require more 'daylight' and warmth afforded to them.  Today I purchased a Grow light (Jump Start 4') and one that could provide enough light for not only the seedlings but also the outdoor potted plants I stored in the garage to over-winter.  It is a nuisance to drag out the pots on the days in the spring that are in the double digits, only to drag them all back in again before the temperatures drop.  Yesterday, I spent hours folding paper pots and transplanting the tomato plants that are looking rather sorry from lack of light.  I cleared out a corner of our garage and suspended the adjustable light hanger with 4' bulb and angled to reach all the plants.  The best part... this unit was on sale for $60 off!!!  This unit can be used all year round to produce lettuce and other veggies.  


Tomato plants: These plants need to be transplanted so that the roots are at the very bottom of the paper pots and filled to just under the first set of true leaves.  The hairs on the stalk will produce roots and help to create a stronger stalk.  Healthy leaves should be emerald green and rigid.  Some plants might seed but then do not thrive without ideal conditions of light and moisture.  This of course is what we are currently dealing with and of course the fact that the light from the windows encouraged horozontal growth.
Peppers: These have been consistently good growers and all from seeds harvested from store bought peppers.  Their growth has been remarkable even without a grow light.  They too require top lighting to give them upright stature.


Marigolds: are in the flat to the far right and most of these have little flower buds in the middle.  These seedlings have grown remarkably fast and most of the seeds took.  For the few cells that did not, I have placed seeds in those cells to get a better yield.   I have another flat that I will have to seed as well because there were fewer seeds that took in the first planting.  Having these already blooming and in the garden will help when the transplanting begins to discourage cats and attract bees.

Squash: These seeds take longer to germinate.  Without a heating pad, these seeds took a few weeks and of course not all seeds took.  It is by far easier to sprout these first in a glass container with wet paper towel to see which ones are viable and plant only those that will produce a plant.  In the second photo below, you can make out the root shooting out and downward from the seed coating.  Once the first leaves are out, I will plant them into a paper pot.  These seeds are from a peppercorn squash.


Hints and Tips

Lettuce, Swiss Chard and leafy greens:  According to my friend Pat, who has years of farming experience - these should only be planted directly into the garden and I whole-heartedly agree!!  These do not grow well at all without being directly under a grow light or sowed directly in a garden. 

Potatoes: According to Pat, when growing potatoes in an above ground growing box, you should line the bottom of the box above unturned ground with rotting leaves.  She suggests that you place raked leaves from the garden beds into a black garbage bag and place it on the black asphalt driveway to really break it down quickly.  She warns that it will be stinky but will serve the purpose of keeping bugs out.  We will be building the boxes from the ground up by using four 36" stakes inserted into the ground forming a square.  The four sides will have wood slats screwed into the stakes on ground level. Note:  We will show you a step by step pictoral of our potato box build over the next few weeks.

Technology, Innovation and tried and true advice:

Using technology and innovative ideas to help grow a garden while implementing tried and true methods gives any beginner urban grower an advantage.  Any advice from someone with experience is  very worthwhile and will pay dividends in saving money, time and aggravation.  Networking with other urban gardeners, books and online blogs are great resources as are local growers and the Farmer's Almanac.  

As an Electronics Technologist, I will eventually want to incorporate some innovative additions to the ever evolving garden.  I hope to eventually put in automatic drip irrigation, motion detect 'rodent' tripped sprayer and photocell controlled underlighting for the boxes.  I will also integrate a few pinhole cameras to monitor the garden for little visitors and hope to get it streamed.  I also want to use a waterproof camera in our fish pond to check on how they are doing... a live fishtank!!  We cover the pond through the winter and until we remove the cover, we cannot see how they are doing.  Our neighbor just lost all of his fish because the pond froze solid.  Either his heater failed or he didn't use one.  

Adding to the wish list would also involve using our fish pond in the back of the house to provide nutrients for a hanging strawberry garden which will provide shade, interest, filtration and best of all - food!!!  Hydroponic growing at its best.

This coming week in the garden:
We will be cutting the pieces for the potato boxes and preparing them for planting.  The planter boxes will be put together and hopefully I will hear back from a local business about the possible use of Chalk paint as opposed to wood stain that will leech into the soil.  Investing in proper materials and protecting your investment are the important foundations for an Urban Garden.

We will also check in to how the plants are doing now that they have a grow light to give them a much needed boost.